123 Street Avenue, City Town, 99999

(123) 555-6789

email@address.com


You can set your address, phone number, email and site description in the settings tab.
Link to read me page with more information.

Blog

Filtering by Category: a guest

creating ripples of love :: an interview with Laura Yon

liz lamoreux


During the last few months, you might have noticed me mentioning here and in my newsletter that I've started going to see "my teacher" up in Seattle every few weeks.  

Laura Yon was my teacher during my two-year yoga teacher training 10 years ago, and she remains my teacher today. She's been helping me with my practice and giving me a soft space to land where I can just be me. She's also teaching me more about meditation and Buddhism, and I'm feeling so blessed to be learning from her on a continuous basis again. We all needs guides and teachers to shine a light for us.

Over here, I keep sifting through my thoughts and feelings about all that's happening in our world, in the United States, in my own corner, and I try to make sense of what's being said aloud by people who are "in charge." And after my last post, I've heard from so many of you that you're doing the same, so I decided to ask Laura if she'd give her perspective on some of the stuff I can't stop thinking about.

She said yes.

And while I had her "on the line," I also asked her about her retreats as I think several of you reading these words would love to connect with her in person. (The safe space she created during our two-year training is one big reason why I felt moved to begin my retreats.)

Read on...

How does yoga and meditation help you keep your heart open amidst whatever is happening in your own life and/or the world around you?  

It is tragic to watch the events of the world and see the suffering that humans continue to perpetuate against one another. The esoteric answer is that, "everything is just as it is supposed to be." This world is a place where there is great love and beauty and also great sorrow. And we are here to fulfill the lessons that each of us is here to learn.

I believe that the fabric of the universe is LOVE and by continually dropping deeply into the places in myself that are connected with this universal energy, I stay charged with a feeling of something greater than myself and of this place. I know that this place is temporary, this feeling is temporary, this suffering is temporary and the universal, eternal energy of LOVE is ever-present, with every breath.

What would you tell someone who feels hopeless when watching the news right now? How can they move from hopeless back to love?

How are you going to be in the world and what ripples are you going to put out into the world?

When something "bad" happens, our first reactions may be based in fear or anger. But meeting the world's events with more fear and anger just reinforces this patterning in the world and in ourselves. All of our thoughts, words and actions have powerful effects, and they create ripples that flow out into the world. Those ripples can be ones of more fear, anger, hopelessness or of LOVE, compassion and understanding.

As the Dalai Lama says, we are ALL human beings who are suffering and we ALL want the same thing - TO BE LOVED. So creating ripples of LOVE, compassion and understanding have a positive energetic effect in the world.


Sometimes when we're overwhelmed by what's happening in the world or even to others closer to home, we can feel guilty when we experience good things, as though we should feel bad because we can't fix it all or because we're experiencing joy in our lives. That word guilt is such a big one. I so often talk about how we can hold the beauty in one hand and the grief in the other. Do you have a practice you use that helps you navigate this?

The power of a daily meditation practice for helping us to find balance, equilibrium and clarity in this crazy world can not be over emphasized! It helps us to remember what we are here to do, what is our work and what is someone else's. Their work is not for us to do; it is their practice and lessons to learn. I have a friend who says it is like what the flight attendants say on the airplane, "Put your own oxygen mask on first, before helping others with theirs."

Chanting is another powerful tool to help us stay centered, remember what we want to be creating in our lives, and it can change the energetic charge of the moment. When my mind starts to spin or move in a direction that isn't helpful for me, I come back to my chant. It cuts through the busy-ness of my mind and I can go, "AH, there's my heart, that's where I can rest back into."

I think about the retreats you host and how they are full of moments of joy and restoration while also an invitation to get quiet and listen. Can you share about why it's important to get away and give yourself this gift?

Retreat time is so important! It is a time to re-direct our focus from the external world to our inner world. Everything we are searching for is inside of our own heart, most people just don't have the time in their lives to stop and listen to what our heart's are saying. To have an extended period of time where we get to stay inside the space of LOVE and openness, quiet and listening to our inner, innate wisdom and compassion, is essential to maintaining a spiritual life within the modern city. It is respite for our SOUL.

When we come back from retreat, we then take that wisdom, compassion and LOVE out into our lives, our work and our relationships. It is truly transformative!

happy souls at one of Laura's retreats

Over the years, you've taught me so much about how to create safe space and community. Within the safe space at one of your retreats and even in your classes, students get to slow down, listen, ask for what they need, and find stillness all while in community with you and others. Do you feel like the sangha you create becomes a place to practice how one wants to move through the world?

ABSOLUTELY! Deep, deep listening is SO powerful! In yoga classes and on retreat, the room will become so quiet as everyone drops deeply into their own peaceful stillness. It is so beautiful to witness! Being in sangha with a group of people who are all on an inner journey helps us to become present with what we want to manifest in our world.

As Goswami Kriyananda said, "Whatever you are doing at this moment is what you will be doing more of in the future." So what are we creating with every breath - LOVE, compassion and understanding or something else? We get to choose what we are creating for our lives! Being on this journey with others who are practicing this as well is a truly a gift!

*****


Laura Yon has taught hatha yoga in the viniyoga tradition since 1992 and as a student/practitioner of Buddhism for 30 years, she integrates mindfulness into all of her teaching. To learn more about Laura Yon, visit her website.

She has an incredible retreat coming up in February. And it's in sunny, warm Mexico! The perfect time to get away and spend time in the quiet, practice yoga and meditation, and connect with kindred spirits. It's at one of the world’s best yoga retreat centers on the Yucatan Peninsula, south of Cancun. Swim in the beautiful Caribbean Ocean, enjoy amazing food and great company, explore Mayan ruins, snorkel, walk on the beautiful beach, and have a spa treatment. You can find out all about it here.

deliciously slow (with leah kent)

liz lamoreux

Note from Liz: I'm delighted to welcome Leah Kent as a guest today. She's sharing about one way she waters her soul: slowing down and making simple, delicious meals. Enjoy her post today!

I have always believed in the power of a simple but delicious home-cooked meal to feed a person from the inside out. When we eat well, it sets the foundation for living well. Connection and celebration and magic can happen around the dinner table, night after night. This is why the kitchen has always been my sanctuary and chopping vegetables is often my daily act of meditation.

Once our sweet little boy was born, it seemed like these treasured routines unraveled a bit. I wasn’t sure how to cook with his warm little body tied to mine in his soft, stretchy wrap pretzeled around my chest. Even in the glowy haze of falling in love with my newborn, I certainly missed parts of the life I had before.  

Never have I been more appreciative of every free moment I can find in any given day since becoming a mama. No one can prepare you for how time will shift and change when your world expands to embrace your new and precious little person. 

In these early days of mamahood the words “deliciously slow” came together for me one day. Rather than focus on the exhaustion, messy house, and unfinished projects, I chose to find at least one moment of joy and beauty each day and embrace it.  

Maybe I couldn’t do all the laundry that day, but I could walk with the baby to the end of the block and see the sun shining through the woods. I would take a photo of that moment and share it online like a journal entry of my newborn mama life. 

Deliciously Slow started as a daily photo meditation and grew into something else for me. I felt very challenged to keep making home-cooked meals once I was a mama. But I was committed to eating well and at home, so I started to use my slow cooker almost every night. 

I made soups, stews, steel-cut oats for breakfast, dried beans, roasts, and more. Being able to add the dinner ingredients to a pot and then walk away? It was life changing. I was able to relax more, enjoy my time with my babe, work on my business, and still eat things that made me feel good.

Preparing meals in the slow cooker has had such a positive impact in my life because it frees up time in the kitchen so I can tend to my creative pursuits. I want that for all women and mamas who want more space in their lives to do what they love while still nourishing themselves with beautiful food. 

That is how Deliciously Slow grew into a pay-what-you-can online course to help you prepare healthy slow cooker meals. It’s a seven day class with a beautiful printable cookbook where I share everything I’ve learned about how to use the slow cooker to make truly delicious breakfasts, lunches, and dinners with whole food ingredients. Our fall session starts on November 2nd and I invite all who are interested to join at a price that feels just right for you. 

I’m so happy to be sharing a recipe with you for one of my favorite slow cooker discoveries…breakfast. The first time I made overnight oats and woke up to breakfast I did a happy dance. A hot meal waiting for me with no thinking or cooking required? The morning felt so luxurious! 

That is my wish for you, too. To feel the luxury of spaciousness. To stay present and cultivate gratitude for the small miracles and pleasures daily life offers to us. To eat well, nourish yourself, and savor the deliciously slow moments. 

Deliciously Slow Spiced Fruit Steel-Cut Oats

Ingredients

1 cup steel-cut oats

4 cups water

1/2 cup dried fruit such as raisins, cherries, blueberries, or cranberries

1 tsp cinnamon mixed with a pinch of cloves, nutmeg, and allspice

1/4 tsp sea salt

2 T maple syrup

Directions

Combine all ingredients in the crock. Cover and cook overnight on Low for 7 to 9 hours

Stir oatmeal well before serving in the morning. Serve with desired toppings such as almond or coconut milk, brown sugar, maple syrup, chopped pecans or walnuts, toasted or shredded coconut, and fresh cut fruit.  

Leah Kent founded Skill It to celebrate the everyday pleasures of living a {mostly} handmade and home-cooked life. A mama and artist, she loves sharing her passion for food, family, and creativity with others through her writing and teaching.

In addition to creating beautiful e-courses like deliciously slow, she is a certified holistic life coach. She makes her home in Rhode Island and relishes every opportunity to connect with the natural rhythms of daily life.

Deliciously Slow begins November 2. Learn more right here.

pinned it. did it. {with doña}

liz lamoreux

Doña has done it again with another fun Pinned it. Did it. post! Love this idea. I can think of about three skirts I'd like to do this with and make some fun new dresses for Ellie. And her time-saving hemming tip might have just changed. my. life. Read on...

***** 

Recently a friend told me about the horrendous bridesmaid dress she refashioned for her daughter into something cute and actually reasonable to wear. If I recall correctly, the process involved removing the bodice, turning it backwards, reworking the waist pieces into a folded collar and changing the length of the skirt.

I was impressed. I love the idea of re-fashioning clothes (and hope someday to take a class from the talented Emily Falconbridge on this topic), but I just can’t seem to imagine how to take apart an item of clothing and see it as something else. Let alone make it.

So I was pretty proud of my accomplishment this month, turning one of my old skirts into a dress for my preschooler. 
 

Mind you, this is a very simple re-fashion, but it gave me more confidence to try other things. 


I bought this skirt back when I was pregnant, while visiting my grandparents in Canada, both of whom have since passed. Honestly, it never looked good on me and I don’t really know why I bought it. But I did like the fabric pattern and because of the connection to my grandparents it has hung around through several closet purges. But I knew I wasn’t ever going to wear it. One day I realized that skirt length on me equals dress length for my daughter – I could turn it into a dress!


I found a very simple pattern on Pinterest for a dress with about the same shape as the skirt panels, took some measurements, and started disassembling.

It turns out this skirt was quite well made, with French seams and lining. Taking it apart was the hardest and most time consuming part of the whole project!


Once I had the waistband off and the lining removed, I had to figure out how to shape the actual dress. The original skirt was made of six panels but I didn’t need that much width, so I removed two panels and sewed that side seam back together to make a narrower tube.

Then I followed the instructions and measurements to cut armholes and the neckline casing.


I recently made my first project from a Japanese pattern book, and I picked up an awesome tip. When you are pressing a hem or folding in and pressing a casing, mark an index card with the width you need for each fold and use it to turn and press the fabric. This is so much faster than the way I learned to do it way back in high school!


The old waistband piece turned out to be just long enough to make a nice tie, so I sewed the long edge together and threaded it through the top edge casings.

And that was it!

The final dress is a bit big for my daughter right now, but it should be perfect next summer, and may even fit another summer after that.

I could not for the life of me get a not-blurry picture of her in it, but she did ask me if she could get married in it, which I am happy to take as a complement of the highest order.

Have you ever taken apart a garment to make something else? I’d love to hear about it in the comments!

Doña Bumgarner is a writer, artist, mama and a craft project-collector from way back. She loves Pinterest and uses it to help solve a household dilemma at least once a week (see her “Pinned and Done,” Handmade Gifts, and What’s For Dinner boards). She lives in Santa Cruz with her partner, their little one and his almost grown one, and a collection of cats and chickens. She blogs at Nurtured Mama.

Registration for her popular 21 Days To A Peaceful Holiday class, designed to help you create a simpler, more intentional holiday season, is now open. You can read more and register here.

Note from Liz: Over here in my corner, I'm focusing on how to "use Pinterest for good." I really see it as a community of people trying to see the beauty and possibility in their lives. I'm continuing to add a few new features here on my blog inspired by or directly about Pinterest as a way to invite others to look for this beauty within a social media community. Connect with me on Pinterest here. Read other "Pinned it. Did it." columns here.

pinned it. did it. {with doña}

liz lamoreux

Note from Liz: Doña is back with a mouth-watering Pinned it. Did it. post. As in I wish I was her neighbor so I could eat some of these kind of mouth-watering post. I heart Pinterest and all the good things we find over there. Read on!

*****

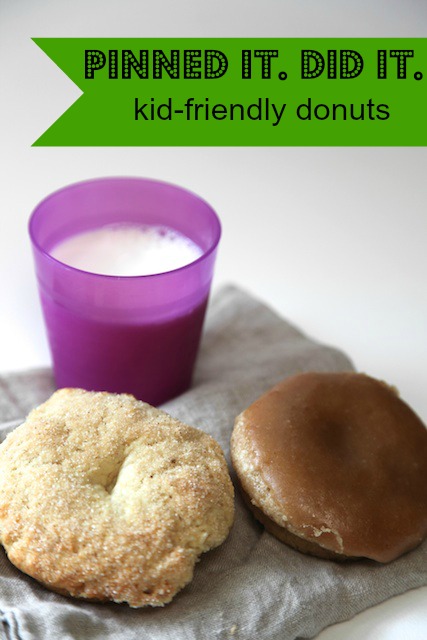
My Pinterest research this week was all about donuts.

Donuts are one of those things that I *could* make at home but would rather not. I just don’t like to make fried food. It is hot and messy and time consuming and then you have all that oil left over. And so unhealthy!

But I found a 6-donut baking pan recently and I knew I’d seen some baked donuts go by in my Pinterest stream. When my daughter asked me this week if we could go get donuts this weekend I decided it was time to tackle the problem of how to make a healthier, less messy, donut at home. 

Baked donuts are big on Pinterest, it turns out. There are simple ones and gourmet ones and everything in between

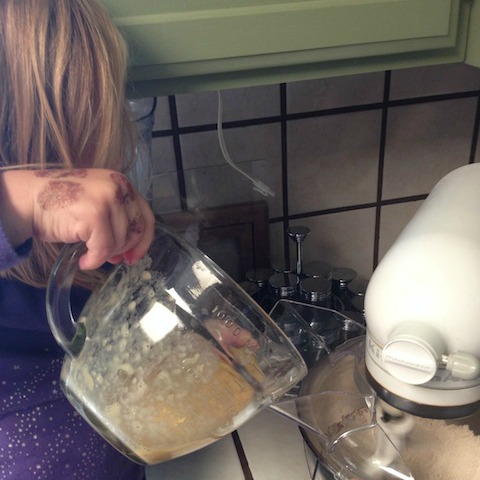
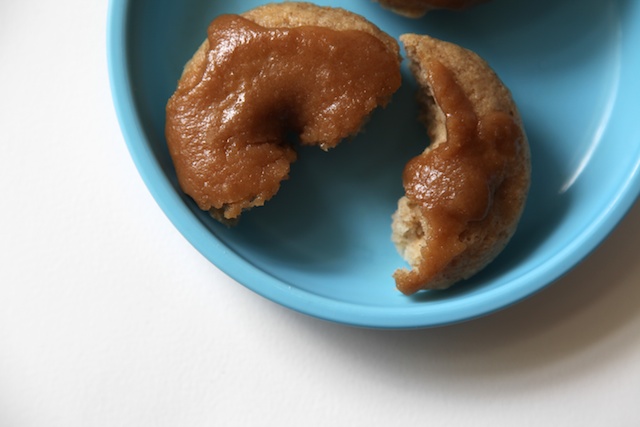
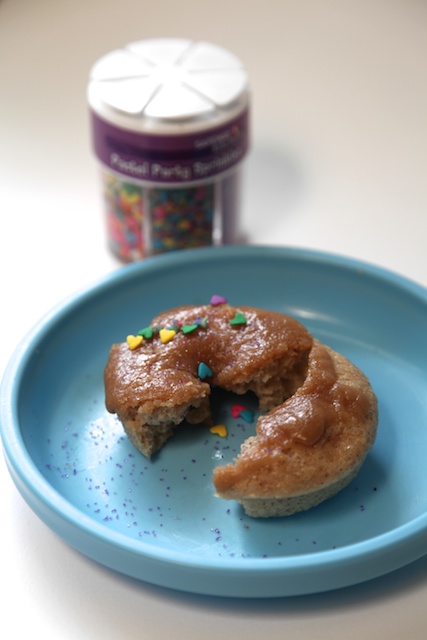
I chose two recipes to try. The first was Banana Donuts with Browned Butter Glaze. My kitchen helper and I got straight to work.


These donuts might even be considered healthy - not much oil or sugar, because they use banana for moisture. The glaze is pretty much a sugar-butter riot, but it is also so incredibly good. The browned butter elevated them from a kid treat to something special for the grownups, too. The best part about this recipe is that it is really fast. Just about 20 minutes, start to finish. Make the glaze while the donuts are baking and it will be ready to go by the time they are out and cooled. Make sure to let them cool in the pan for a while - these are so moist that they want to fall apart. 


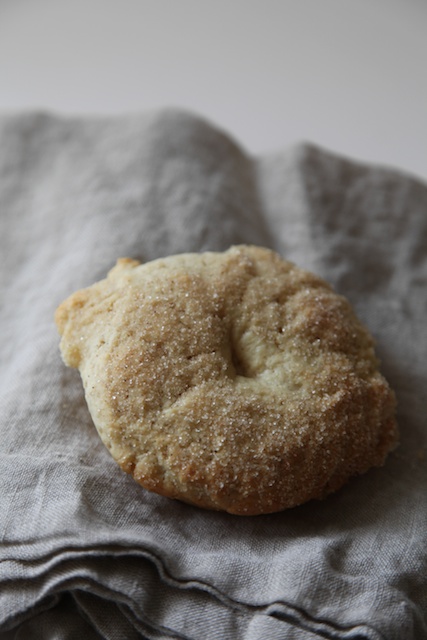
The second recipe I tried was this French Breakfast Donut. I don’t remember eating donuts for breakfast either of the times I travelled in France, but I’m happy to adopt this “breakfast tradition” the same way I’ve adopted the questionably French eggy pancakes that are my Saturday morning specialty. 

These had a longer baking time, but no glaze to make. I was intrigued that the texture of the dough was completely different than the first recipe. Although they both contain similar ingredients, they are in very different proportions. The batter for the banana donuts was very soft, almost like pancake batter. The batter for the french donuts was thicker but the additional baking powder made it light and full of bubbles before I even spooned it into the pan. 


I made two adjustments to this recipe. First, I used soured milk instead of regular by adding a teaspoon of vinegar to the milk, which is basically like using buttermilk. The vinegar may have been why my batter was so bubbly! Also, instead of dipping the cooked donuts in butter before dipping in the cinnamon sugar, I sprayed them with coconut oil (I find this at Trader Joe’s and use it in place of non-stick baking spray). That allowed the sugar mixture to stick, but without quite so much fat. 


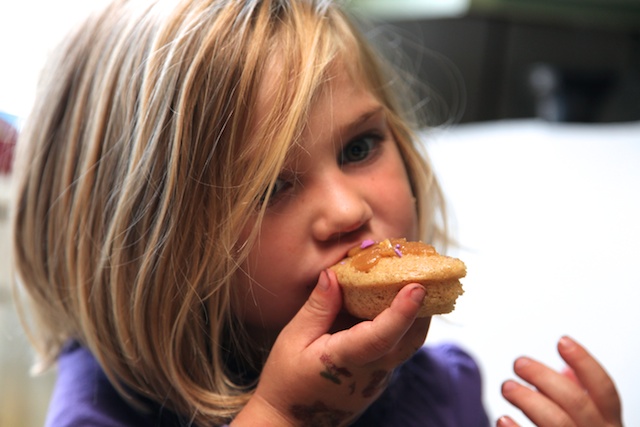
The French donuts were my favorite, but my small taster liked the glazed ones best. Of course, she added sprinkles, because what is a donut without sprinkles? 


I’ll definitely make these again. I generally have all the ingredients on hand and they were fast and satisfying. They are also healthy enough that I feel pretty good about feeding them to my kid. Though I might up my game a bit with these Caramel Cider Donuts once the weather cools off...

Sorry donut shop down the street. It doesn’t look like we’re going to be visiting any time soon!

Disclosure from Doña: Some links are affiliate links, which means I receive a small commission if you purchase from the links.

**** 

Doña Bumgarner is a writer, artist, mama and a craft project-collector from way back. She loves Pinterest and uses it to help solve a household dilemma at least once a week (see her “pinned and done” board here. She lives in Santa Cruz with her partner, their little one and his almost grown one, and a collection of cats and chickens. She blogs at Nurtured Mama. If you are needing extra support to round out your summer while the kids are home, find her Welcome To Summer resources and printables pack here

Note from Liz: Over here in my corner, I'm focusing on how to "use Pinterest for good." I really see it as a community of people trying to see the beauty and possibility in their lives. I'm continuing to add a few new features here on my blog inspired by or directly about Pinterest as a way to invite others to look for this beauty within a social media community. Connect with me on Pinterest here. Read other "Pinned it. Did it." columns here.

pinned it. did it. {with doña}

liz lamoreux

Note from Liz: Doña is back with another post inspired by Pinterest. Love this honest insight she's given into her experience and the suggestions for what to do when tackling a sewing tutorial found on Pinterest.

*****

Have you ever used Pinterest as a search engine? Like Google, but with pictures for every hit?

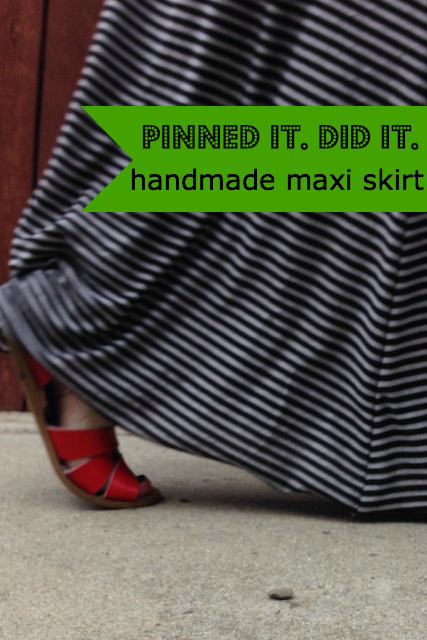
It is one of my favorite ways to use it. When I decided recently that I wanted to make my own maxi skirt, I skipped Google and went straight to Pinterest. With their new search tools, it is even easier to hone in on what you are looking for. You can even search in your own pin boards if you use the “just my pins” filter. 

Searching with the words “maxi skirt” mostly returned fashion boards with styling suggestions and skirts for sale, but “maxi skirt pattern” hit the jackpot. There are many many free patterns, but most of the ones I looked at were poorly written and confusing. Here’s one good one. Eventually I found this pin and followed links to this post and this pattern for sale on Etsy.

I downloaded and printed out the pattern, bought some stripey bamboo jersey fabric, and got to work. 

But all did not go as planned. 

This was supposed to be an easy project! There are only four seams, what could go wrong? Well, a lot, it turns out. 

It all turned out well in the end, but I learned some lessons. So that you may have an easier sewing experience with this project (or any other), I’ll share them with you here:

  1. Check your measurements carefully. Like two or three times. Because most of this pattern is based on your waist measurement, be very sure that you measured it correctly! Ahem.
  2. Read through the directions to make sure you understand them before you begin. I’m a pretty experienced sewist, so I may have skipped this step. As a result, I missed an important detail which made all of my pattern pieces twice as wide as they needed to be. Whoops.
  3. It is generally not a good idea to cut out fabric late at night after having a beer with dinner. Luckily, I figured out all of my errors before actually cutting anything out so no fabric was wasted. This could easily have been a disaster.
  4. Also not recommended is cutting out a large piece of fabric on the floor with three frisky cats in the house. 
  5. Unpicking mis-sewn seams is not the end of the world. But if you need to do it, and you are sewing black fabric with black thread, make sure you have good lighting.
  6. Sometimes it is easier to cut off a seam than unpick it. Only use this shortcut if you have a little extra fabric to spare (my waistband is 1/2” shorter than originally intended).
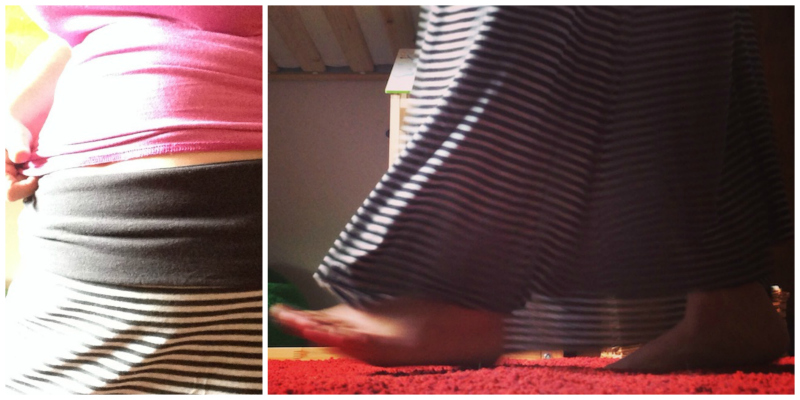
  7. Taking the time to line up the stripes for the skirt’s side seams is worth the few extra minutes. It really makes your work look professional.
  8. Using a sewing machine needle intended for stretch fabric really does make a difference. I forgot to change out my needle until just before the last seam. That last seam is beautiful. The rest are a little messy. 

If you follow all the directions correctly, this is a really straightforward and rewarding project. It is also pretty fast. Even with all of my mistakes, it only took me a couple of hours. It would not be unreasonable to finish this in an hour. 

I love my new skirt and I will be making another one soon. Maybe not after a beer, though. 

Doña Bumgarner is a writer, artist, mama and a craft project-collector from way back. She loves Pinterest and uses it to help solve a household dilemma at least once a week (see her “pinned and done” board here). She lives in Santa Cruz with her partner, their little one and his almost grown one, and a collection of cats and chickens. If you are needing extra support to ease into summer with the kids at home, find her Welcome To Summer resources and printables pack here

pinned it. did it. {with doña}

liz lamoreux

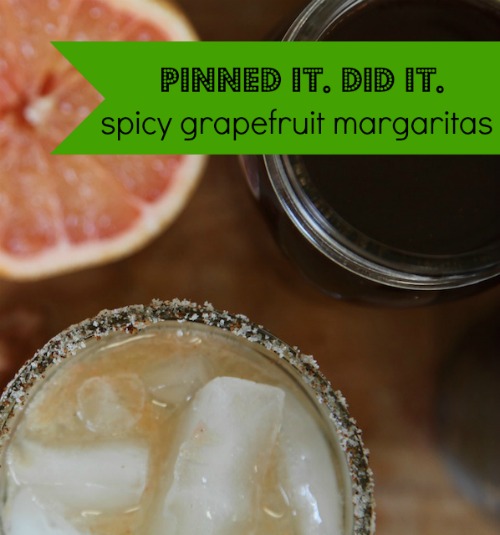
Doña is back with another Pinned it. Did it. post and it involves margaritas. Yes, please. Read on!

*****

My love affair with spicy cocktails began on a sweltering day in an upstairs cantina in Santa Fe, New Mexico. Coyote Cafe makes a Hatch Chile-infused margarita called the Norteño, so good it is even mentioned their TripAdvisor reviewsHatch Chiles are grown in the Hatch Valley and not widely distributed outside of New Mexico. They are everywhere in Santa Fe. They are often served roasted, smoky and mellowed, much like the Ortega green chiles I’m familiar with in California. 

That chile-infused margarita, ordered on a whim, was so good that I ordered another, which was one more than I generally drink in an evening but something I only regretted slightly in the morning.

When I returned home I wanted to make my own version so I read up on infused and spiced drinks. I discovered that there are two ways flavors are added to a concoction. Most often, the alcohol is infused with the flavoring. Stoli Vanilla Vodka is a common commercial example. This is how the Santa Fe margarita was made. It is simple enough. Just add the flavoring agent - roasted chiles in this case - to a bottle of alcohol and let it sit for a while. For best results, let it sit for a couple of months. 

I tried infusing a bottle of tequila with roasted Padron peppers late that fall, but by the time the bottle was ready to use I had fallen pregnant. The peppers had turned the alcohol the most gorgeous stormy grey, but even the smell turned my stomach and I gave the bottle away to someone who would appreciate it. Margaritas didn’t figure in my life for quite a while after that.

Last spring I was again reminded about spicy cocktails when I saw a photo of this Spicy Grapefruit Margarita in Ali Edward’s Instagram feed. This recipe uses the other infusion method - flavoring the simple syrup. This method is faster. Just simmer the seasoning in the sugar water and it is ready to use. I got as far as making a jar of the infused simple syrup but the very next day I found out I was pregnant again.

Sometimes I’m sure the universe is conspiring against me.

Another whole year has passed and I’m determined to make my own spicy drink at home! 

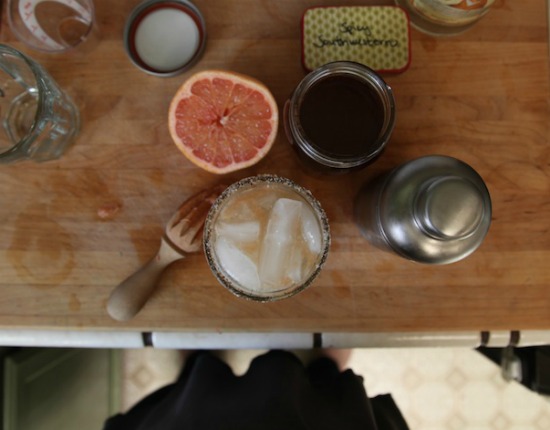
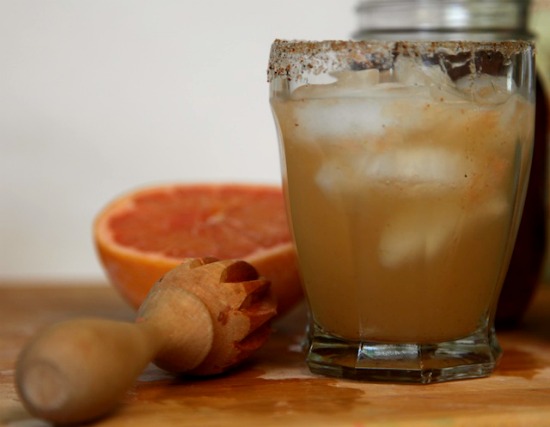
Success. And delicious. This drink will be on rotation in this house this summer for sure!

I tripled the proportions for the simple syrup from the original recipe to make enough to store in the fridge for quicker drink-making. I went with the 1/4 tsp suggestion for cayenne, which gave just enough heat and flavor, but is not overwhelming. Warming, but not really hot. You could add more if you prefer truly spicy.

I halved the rest of the recipe to make a single drink - her proportions will make two. Make sure to shake the ingredients with a lot of ice to get them nice and cold and blended well. I prefer the mellower aged flavor of reposada tequila so that’s what I buy, but I really don’t think it matters for this drink. 

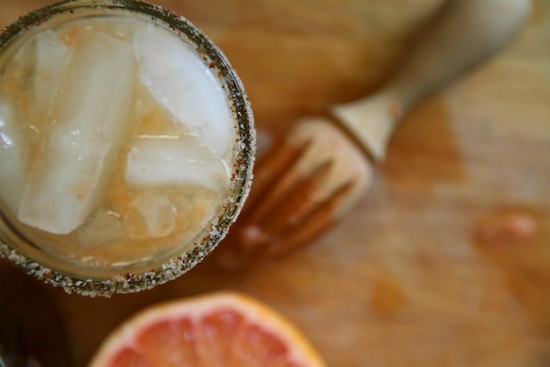
I did try her suggestion to use rubbing spices for the rim and it was delicious. I’m going to try smoked paprika with salt next time.

My man, who eats every meal with a fork in one hand and a bottle of Sriracha sauce in the other, doesn’t like hot flavors in his cocktails. It was easy enough to make his drink plain by just using non-infused simple syrup in his glass and plain salt on the rim.

I’m officially a spicy drink convert. Once we hit the cooler months, I’m going to try this Chai Honey Old Fashioned. I like to drink the brown alcohols in the cooler months. 

Doña Bumgarner is a writer, artist, mama and a craft project-collector from way back. She loves Pinterest and uses it to help solve a household dilemma at least once a week (see her “pinned and done” board). She lives in Santa Cruz with her partner, their little one and his almost grown one, and a collection of cats and chickens. If you are needing extra support to ease into summer with the kids at home, find her Welcome To Summer resources and printables pack here. You can also connect with her on InstagramTwitter, as well as on Pinterest, of course.

pinned it. did it. {with doña}

liz lamoreux


Doña is back with another inspiring post about a DIY she found on Pinterest. I've seen these Story Stones and love how accessible Doña makes them. Read on!

*****

I’m a creative person. I’ve worked hard at building, feeding, and nurturing creativity in my life. As a mother, I love witnessing my young daughter’s innate creativity. How much we are all born with! But I also know how easily that creativity can be squashed.

It might be squashed by teachers who are trying to get a classroom of energetic kids in line, by schools with a focus on academic achievement, by people who don’t understand or who are threatened by the unusual, and sometimes by well-meaning parents. 

Because I know she probably has that road ahead of her, I feel it is my duty right now, while she’s young, to build extreme creative resilience.

I do this, mostly, by giving her lots of open ended toys and unstructured play time. We have blocks and peg dolls and play silks and more. I have a whole Pinterest board of Waldorf-style toys that I love for their open-ended playing qualities. I also make sure to let her see me being creative - in the kitchen, in the garden, while playing with her, as well as in my studio with my own craft and art projects. She loves to work alongside me at my “big desk."

One area where my creativity is lacking, however, is story telling. Bean is getting to be an age where she’s making up stories and playing pretend a lot. I wish I could say I tell her stories at bedtime, but after “Once upon a time…” I freeze up. I simply don’t know where to go next.

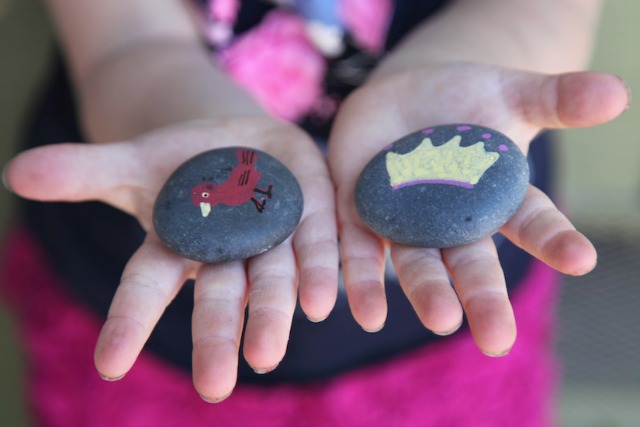
Recently in an attempt to jumpstart my own story-telling abilities, and also to encourage hers, I started looking into story stones. I had heard of them, but had never seen them, and wanted to make my own. Pinterest, of course, had a wide variety of ideas.

There were these with highly detailed monochromatic drawings. These make the whole stone a character, instead of just having a picture on the top. These use the stones as puzzle pieces to create new character combinations. 

I decided to make a set like these – simple, colorful and fun. 


I had some rocks leftover from a friend’s landscaping project, so I picked out 10 flat-ish ones and scrubbed them with soap and water to get them pretty clean. These stones are a nice size - a handful for my daughter, but not enough to really hurt if she dropped one on her foot. If you are collecting rocks from a beach or river for this project, just looks for stones that have one flat side for the image and have a fairly smooth surface.

I decided to use images of things that my daughter is drawn to or talks about often already, so my pictures included a house, a baby, some flowers, and a bug. I showed her the first couple and then got her input on what other pictures she’d like. “A bird!” she said, “and a kitty cat.”


I used a combination of Montana acrylic paint pens and Sharpie oil markers, because I had them already, but I think the Infinity Markers that Liz used for these Soul Mantra Stones would work really well. You could also paint your pictures with a brush and some acrylic paint.

The stones I’ve seen for sale are all sealed with some kind of top coat, but I didn’t bother. Since my daughter loves the sound of them hitting each other, I’m sure it is only a matter of time before the pictures wear off. No matter, they only took me about 30 minutes to make!


As with any other new toy, she had a surge of interest when I first introduced them, and then left them to play with something else. It may take a few weeks before they cycle into regular use. I’ve put them in her toy box where she can find them when she’s ready.

PS: If you love the idea of story stones but don’t want to make your own, here’s a seller on Etsy who makes several themed sets.  

Disclosure from Doña: Some links are affiliate links, which means I receive a small commission if you purchase from the links.

Doña Bumgarner is a writer, artist, mama and a craft project-collector from way back. She loves Pinterest and uses it to help solve a household dilemma at least once a week (see her “pinned and done” board). She lives in Santa Cruz with her partner, their little one and his almost grown one, and a collection of cats and chickens. She writes about the practice of moms feeding their souls in the midst of raising a family on her blog, Nurtured Mama, where you can also download her free Mothering Moments ebook. 

pinned it. did it. {with doña}

liz lamoreux

Doña is back with another Pinned it. Did it. post. At my retreats, Sasha makes some pretty awesome recipes with quinoa and every single retreat I think, "I'm going to use that stuff more often." But my husband is determined to stick to the story that he isn't a fan. But I love it and am convinced my whole family would too if only I knew what to do with it. Doña reminded me that I'm not alone in this and shares an adventure with quinoa that is inspiring me to get the box out of the cupboard and do something about putting it onto the table. Love how she also gives us insight into how she tweaks recipes to use what she has on hand.

*****

This post isn’t about a recipe. Not really about a recipe.

This post is about how to use a recipe as a starting point. It is using Pinterest not as a place where you fall down the hole of craving a beautifully-presented meal or new art supplies or a whole new house, but about how to use Pinterest as the tool that it is - to inspire you and help you use what you already have, well.

What I had was quinoa, and it was lunchtime.

Quinoa is one of those grains that I know I should eat more of, but I just don’t know what to do with it. I had cooked some up to serve with dinner the night before, but then I forgot to serve it. So I had almost three cups of plain leftover quinoa that I knew I should eat but plain quinoa just isn’t that exciting.

I have a shelf full of cookbooks, but they don’t have a search feature. So I turned to Pinterest. I needed a recipe that used quinoa, I could make with what I had in the house right this minute, and that would be fast. 

I found Greek quinoa salad - yummy, but I didn’t have most of the ingredients. 

I found a grilled chicken, avocado and lime salad that looked like an awesome summer dinner, but would take too long for my lunch. I pinned that one for later. 

Then I found it: Blueberry Breakfast Quinoa. I didn’t mind eating “cereal” for lunch, and I was pretty sure I had all of the ingredients. Also, the recipe said it took five minutes to make. And it had a really pretty picture. I’m a sucker for the pretty picture, I admit it.


It is super simple - blend warm milk with cinnamon and vanilla bean, pour it over quinoa, then garnish with blueberries, sliced almonds, and honey.

Once I got in the kitchen I realized I didn’t quite have everything. And also the recipe made enough for four and I was eating lunch alone. I’d have to improvise.

A few years ago I did some traveling with a woman I used to work with who is also an accomplished cook. Whenever we’d eat a meal together in a restaurant, she’d take notes. Not a slavish list of exactly what we were eating, but the flavor combinations. A way of plating a dish that she’d never seen before. What spices she guessed were in there. When she got home she’d use her notes to recreate her memory of the meal, which was not ever what we’d eaten. It was a soup with the spices we’d had in a dessert, or a cocktail with the scent and colors of a starter plate I’d barely even noticed.

After that trip I realized that a recipe didn’t have to be followed, exactly, to make a great meal. I don’t mean bread - if you are making bread, follow the recipe! But with most everything else you can lead with what you have on hand, what you like, what you want to experiment with. Recipes can be sketches, I realized. 

So I started sketching with my quinoa. I roughly divided the recipe into four, so two cups of quinoa became 1/2 cup. Which didn’t look like enough, so I doubled that. One cup of blueberries became 1/4 cup. I didn’t have fresh berries, so I warmed up some frozen ones in the microwave. I didn’t have a vanilla bean, so I substituted some vanilla bean paste that I bought by accident a few weeks ago. No sliced almonds, so I rough-chopped some raw almonds that I picked out of a bag of trail mix. I added some shredded coconut because it sounded good. I didn’t measure the honey or the cinnamon.

I took my bowl of quinoa-with-stuff out to my back yard and sat in the shade of an apricot tree near my chicken coop to eat it, and it was delicious.


Was it exactly like the picture? No, not at all. But it was good. And next time I have some leftover quinoa I’ll be able to make that dish by instinct, not with a recipe.

Need some more recipe inspiration? Browse though my What’s For Dinner board for lots more delicious ideas.


Doña Bumgarner is a writer, artist, mama and a craft project-collector from way back. She loves Pinterest and uses it to help solve a household dilemma at least once a week (see her “pinned and done” board here). She lives in Santa Cruz with her partner, their little one and his almost grown one, and a collection of cats and chickens. She writes about the practice of moms feeding their souls in the midst of raising a family on her blog, Nurtured Mama

Note from Liz: Over here in my corner, I'm trying to "use Pinterest for good." I really see it as a community of people trying to see the beauty and possibility in their lives. I'm continuing to add a few new features here on my blog inspired by or directly about Pinterest as a way to invite others to look for this beauty within a social media community. Connect with me on Pinterest here. Read other "Pinned it. Did it." columns here.