Soul Mantra Stones
liz lamoreux
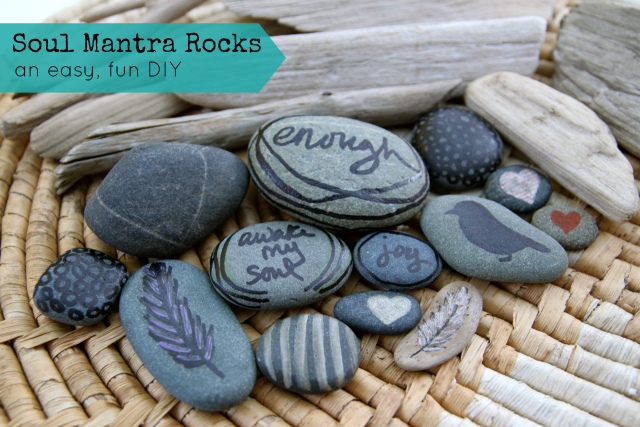
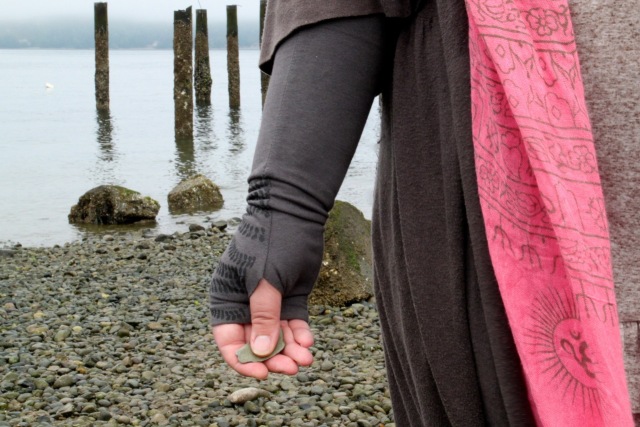
Since I first joined Pinterest a few years ago, I’ve loved all the painted rocks pins, but I hadn’t found a DIY for them that seemed easy enough to get me to actually use some of my favorite rocks from Puget Sound and Lake Superior and put pen or paint to them.
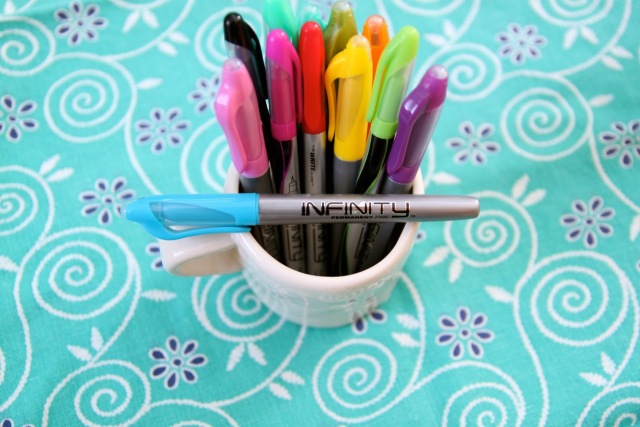
So when Infinity Markers sent me some of their markers to try, I decided I would just tackle these rocks and see what happened.
First, I called in reinforcements via my studio assistant Bonnie. We gathered the rocks from spots around the house, gave them a good washing to remove any sand and seaweed, and let them dry in the sun. While they dried, we got out some paper and started sketching and making lists of our favorite Soul Mantra phrases. Then the fun began (while listening to Mumford and Sons of course).

The first few were pretty much not cute because we were getting a feel for the rocks as a new surface to doodle on. But then we found our groove and just played. I can’t wait to bring these markers to the Story Excavation Retreat next month. Kelly and I are already brainstorming ways we can use them for some fun crafty activities.
Creating Your Rocks
This is more of a “just have fun and play” sort of DIY but here are a few tips to get you started in the hopes that you will see this post and literally think, “I’m going to do this on Saturday.”
Things to think about:
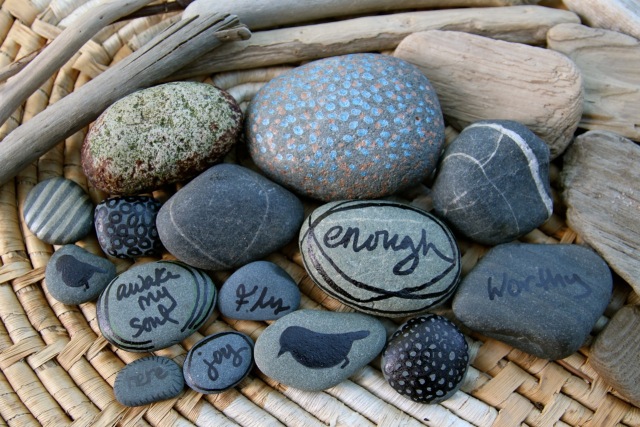
1. The texture of the rock: Just because a rock is flat doesn’t mean it will be easy to write on. We found that a smooth surface was more important than thin and flat. Some rocks were really porous and very difficult to write on and they soaked up the ink. That said, the flatter the easier to write on of course.

2. The shape of the rock: The longer skinny rocks were perfect for the feathers. Rounder rocks created more space for words with decorations. The tiny rocks were perfect for one short word or hearts. It might seem obvious, but when you are staring at the rocks you love and thinking about what to put on them, the shape is a good place to start.
3. What to draw: Look at Pinterest for inspiration! What did you enjoy drawing as a kid or what do you doodle now? I used to love filling up a notebook page with circles, so I had fun adding circles. And Bonnie learned that I’ve never met a polka dot I didn’t like as I kept trying to add polka dots to every single rock we played with.
I really wanted some feathers on the rocks, so Bonnie looked at a few stamps in my studio for reference and then started playing. She used a pencil first to get a feel for the shape and then went over the pencil with both the very fine tip and fine point markers.
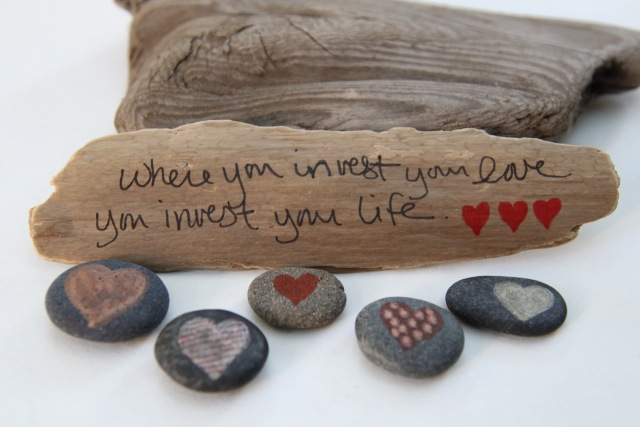
4. Consider other objects to write on: I had some drift wood and created a little altar for the heart rocks with my favorite quote from Mumford and Sons. I plan to put it on the windowsill in our bathroom as a daily reminder of the way I want to live. Love it! Bonnie also used one small piece of driftwood for the smallest feather. Some of the driftwood was really porous, so keep that in mind.
5. If you don’t like what you draw, flip the rock over! You can also use the metallic markers to cover up any of the colors and then write a word on top of the metallic color.
Why we liked using Infinity Markers:
1. I’m just going to start with this one because we kept commenting on it over and over while we were playing: These are permanent markers that don’t stink. For real. In fact, at one point Bonnie said, “I think these smell kind of good.” If we’d been using any other permanent marker for as long as we played with these rocks, the odor would have been too intense.
2. The black marker and the metallics especially look like paint on the rocks. So you have the look of paint, but you have the control of a pen or marker. For someone like me who doesn’t feel comfortable painting freehand with a brush, they are pretty much a dream come true.
3. They dried very fast, which was really nice when we were adding multiple layers. The colors didn't smudge at all.

4. The metallics really showed up on the darker rocks. For this project though, when I tried using them to write the words, the result seemed too “paint-pen like” for me. It wasn’t the marker so much as the look of my writing (and made me think of craft projects from my middle school days), so we ended up using them for accents because they showed up so great. There is even a purple metallic that Bonnie used on her purple feather. Love that.
5. The black fine point was by far my favorite for this project. It would be fun to use all the other happy colors on some lighter rocks though. I could imagine making an entire bowl full of heart rocks in all different colors.
Other Ideas
As we chatted while playing with these markers + rocks, Bonnie and I kept coming up with other ideas.
Letter rocks: It would be fun to make a whole letter set for Ellie to play with. Using one of those letter stencils with these markers would make this super easy.
Talismans: Most of the rocks we made fall into this category. They are words/phrases and images that ground me and remind me to be really present in the everyday chaos. It would be lovely to take a handful small rocks and write several intentions on them and then put them all in a bowl. You could choose one each day to carry in your pocket and then you could hold it in your hand when you need support.
Story rocks: You could draw objects like trees, a house, animals, etc. on the rocks and then you and your child could use them to tell stories.
This weekend, I hope you get outside and gather some rocks and just play. (You can get Infinity Markers at most Target stores! Print a coupon out here.) And let me know if you make them. I’d love to see pictures (and your pins!).
Disclaimer: This post was sponsored by Infinity Markers but the opinions are my own. Some links are affiliate links, which means I receive a small commission if you purchase from the links.
*****
A little note: Over here in my corner, I'm trying to use Pinterest for good. I really see it as a community of people trying to see the beauty and possibility in their lives. I'm adding a few new features here on my blog inspired by or directly about Pinterest as a way to invite others to look for this beauty within a social media community. I look forward to seeing how it all unfolds. Connect with me on Pinterest here. And stay in touch via my weekly adventures in self-care notes.